
Building a holistic test automation strategy for faster feedback
Many teams struggle with slow, unreliable test automation that delays...
Learn how to retrieve device details in React Native using react-native-device-info, with practical examples and no-code testing.
In this post, we’ll learn to get various device information in a React Native app. We’ll use the extremely easy-to-use package react-native-device-info for obtaining this information. You can learn more about this package on its GitHub page.
In order to follow along, readers should have basic knowledge of JavaScript, React, and React Native. We’ll also be using Waldo’s no-code testing tool to test our application.
To start, we’ll use the React Native CLI to create a new React Native app. We’re using the React Native CLI because the react-native-device-info package we’ll need isn’t available in the Expo CLI. The Expo CLI is easier to set up and beginner-friendly, but lots of advanced packages are available only in the React Native CLI.
There are many setups with environment variables and Android Studio for the React Native CLI. The React Native documents on environment setup give a detailed explanation of this.
After the setup, we’ll create a new React Native project. Navigate to any directory and use the command below to create a new project. Give the project any name. I’ll name mine RNdeviceInfo.
npx react-native init RNdeviceInfoWe’ll get the below screen once the installation is completed successfully.
<
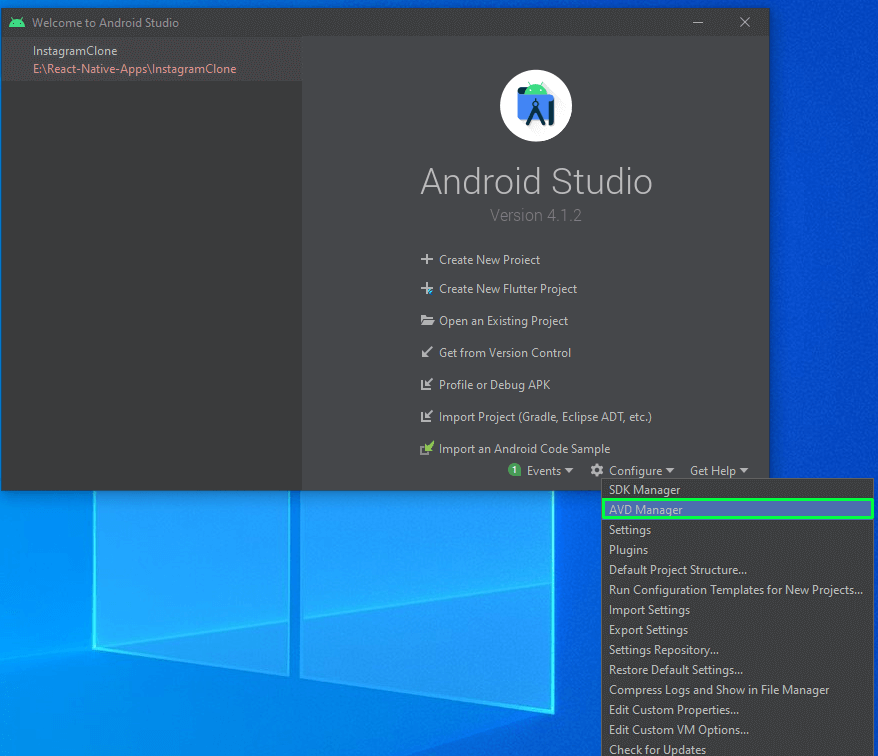
Before starting the project, open Android Studio and click on “Configure.” It will open a pop-up in which you’ll click on “AVD Manager.”
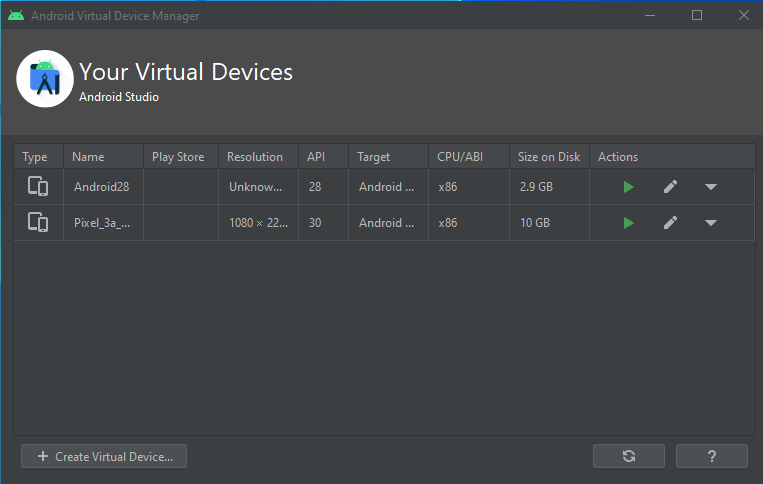
The connected virtual devices configured earlier will be shown. Click on the green play button next to any device.
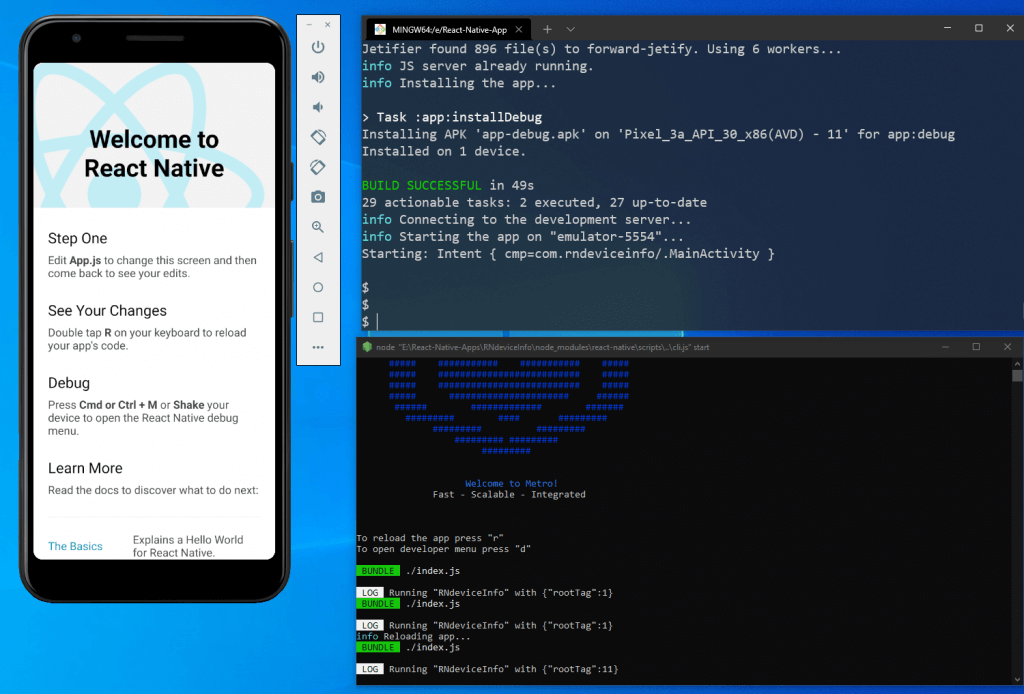
Now, we’ll start our React Native project by first navigating to the directory and running the npx react-native run-android command.
 It will show that the build is successful in the same terminal. And another terminal will open for the React Native CLI. We’ll also get the output of the default app on our Android emulator.
As mentioned earlier, we’ll use the react-native-device-info package for our project. So open your terminal and add the package using the following command:
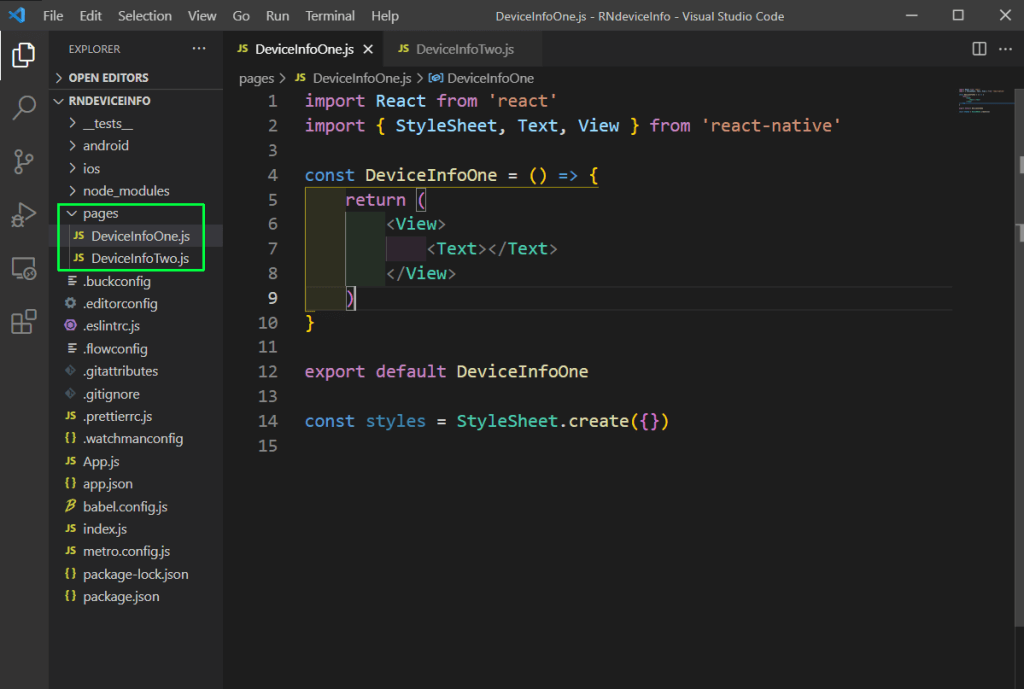
npm install react-native-device-infoNext, we’ll open the code in Visual Studio Code and create a folder called pages in the root directory. Inside the pages folder, create two files: DeviceInfoOne.js and DeviceInfoTwo.js. Both these files contain the basic skeleton code as of now.
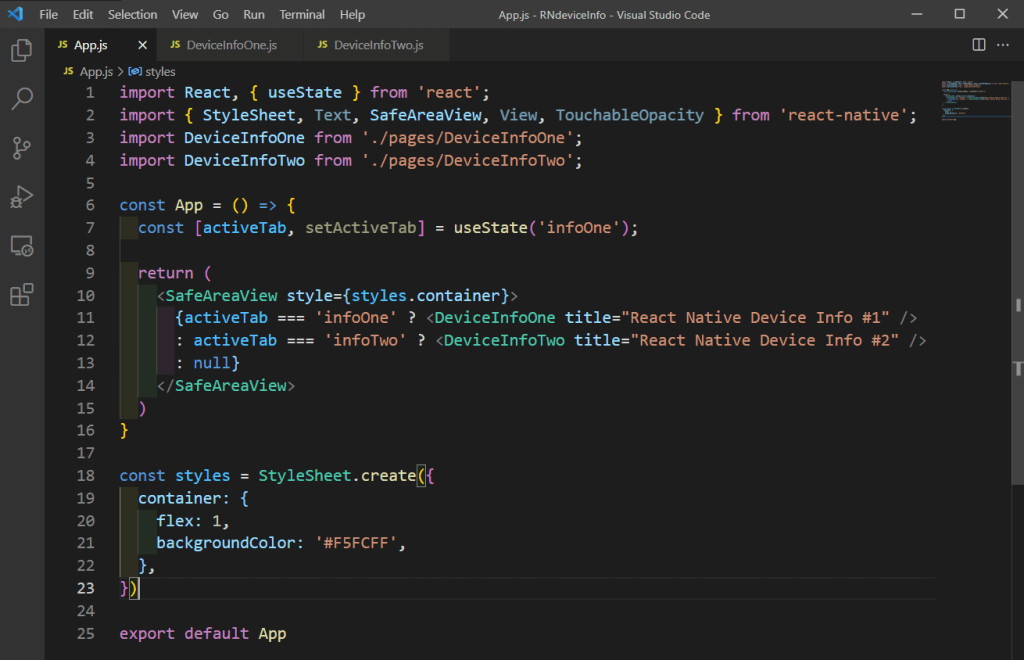
We’ll first start with the app component, where we need to remove all the earlier code. Add the below code in the App.js file, where we’ll first import the required dependencies. After that, inside the app function, we’ll set the state for the active tab using the useState hook.
We have a SafeAreView with styles, which shows the component DeviceInfoOne or DeviceInfoTwo, based on the activeTab state.
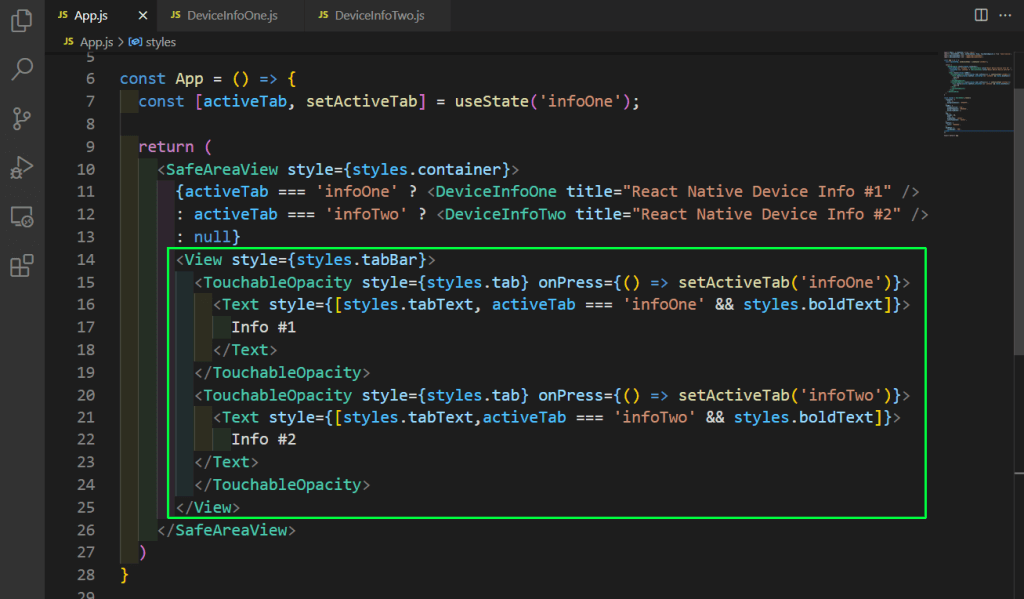
Next, we’ll add a tab bar inside our SafeAreaView. It will contain two TouchableOpacity elements with text in them. Notice that we’re changing the activeTab state based on the click of the tab. So, with this logic, the component DeviceInfoOne or DeviceInfoTwo will be opened.
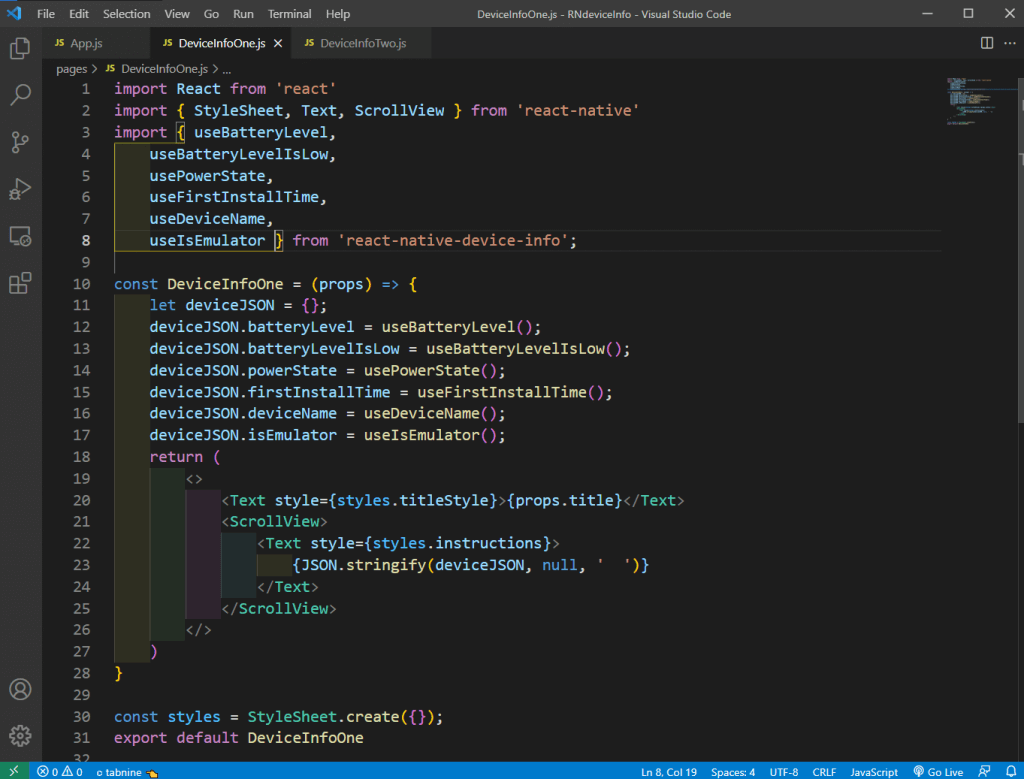
In the file DeviceInfoOne.js, we’ll add the content to show various device info. We’re first doing the required imports, which include various functions from react-native-device-info.
Inside the function, we’ll create an empty object deviceJSON. Next, we’ll add a key as per item and store the value from the imported function. Inside the return statement, we’re showing the deviceJSON with the help of JSON.stringify().
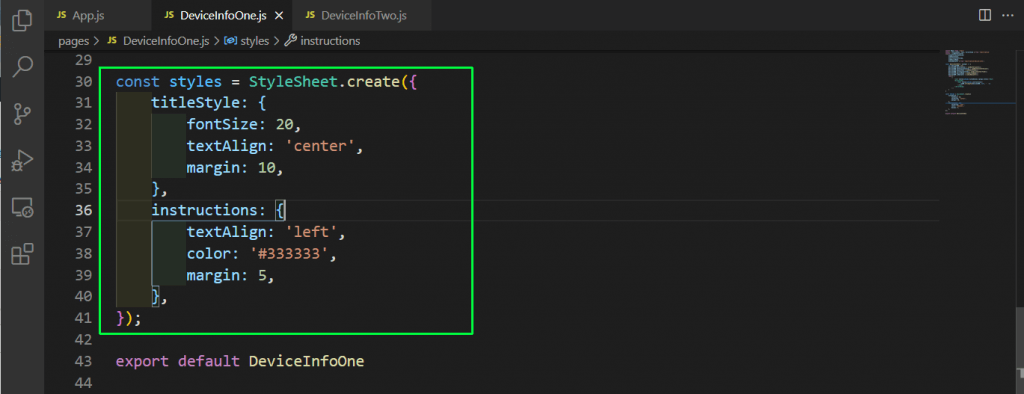
We’ll learn about all these functions next. But before that, let’s add some styles for this component.
Now, our app will display this data.
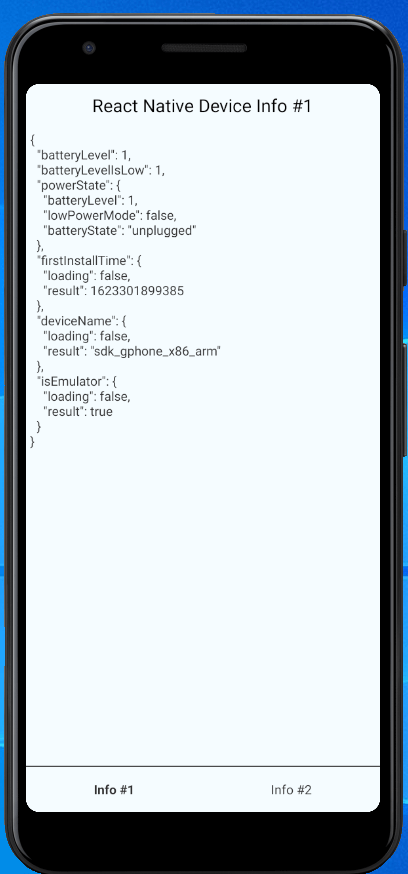
Now, we’ll learn what each of these functions means. All of these can be fired from the user device and sent back for analysis. In our case, we’re just showing them as JSON on the screen.
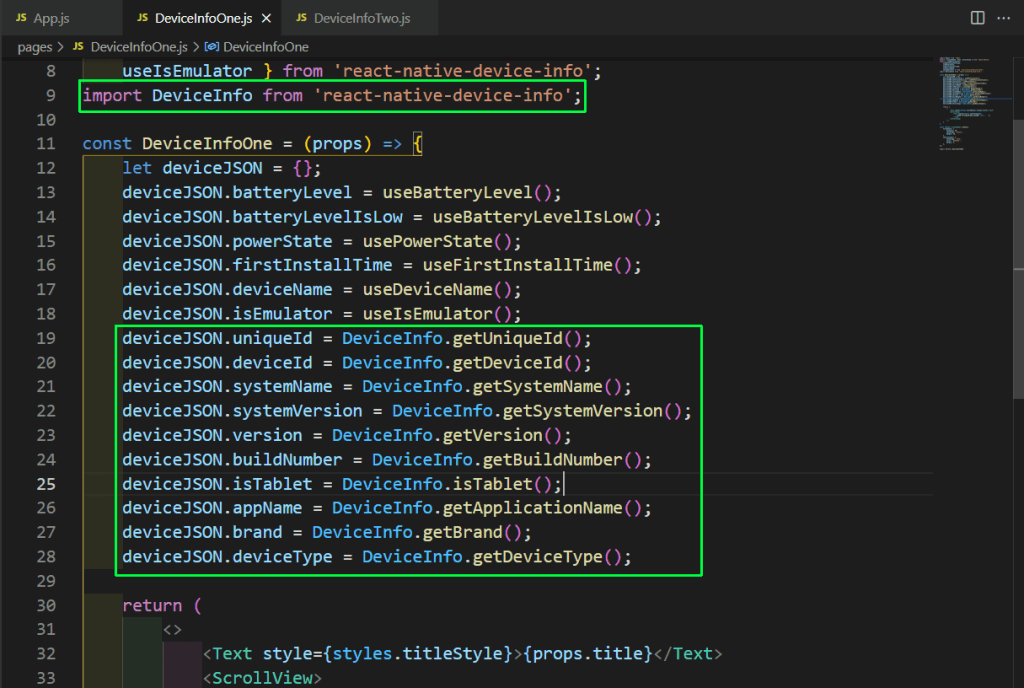
Next, we’ll add more device information in our DeviceInfoOne.js file. For this, we have to import DeviceInfo from react-native-device-info first. We’ll then call the functions directly with DeviceInfo.
We’ll get the new device information on our emulator.
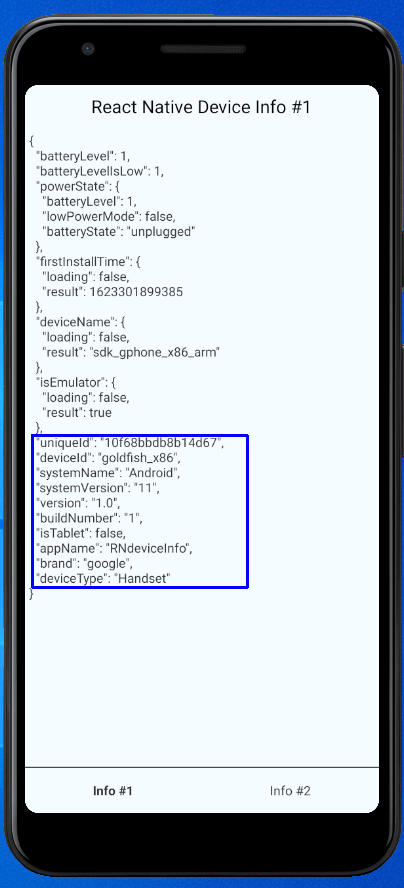
Now, let’s go over what each of these functions means.
Next, in the file DeviceInfoTwo.js, we’ll add more content to show various device info. We’re first doing the required imports, which include various functions from react-native-device-info.
Inside the function, we’ll create an empty object deviceJSON. Next, we’ll add a key as per item and store the value from the imported function. Inside the return statement, we’re showing the deviceJSON with the help of JSON.stringify().
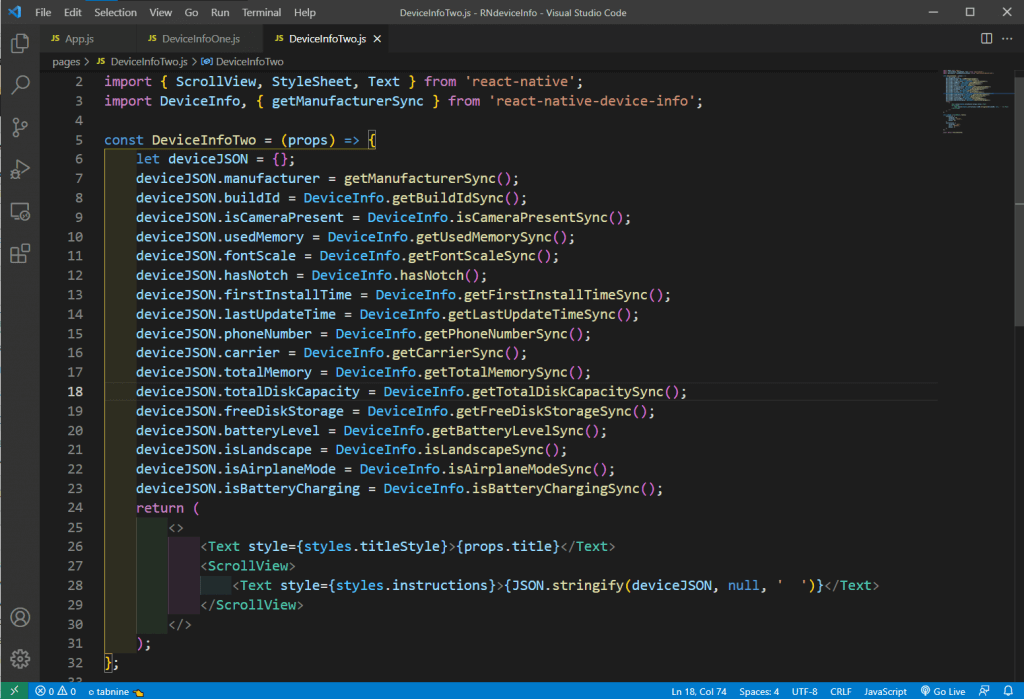
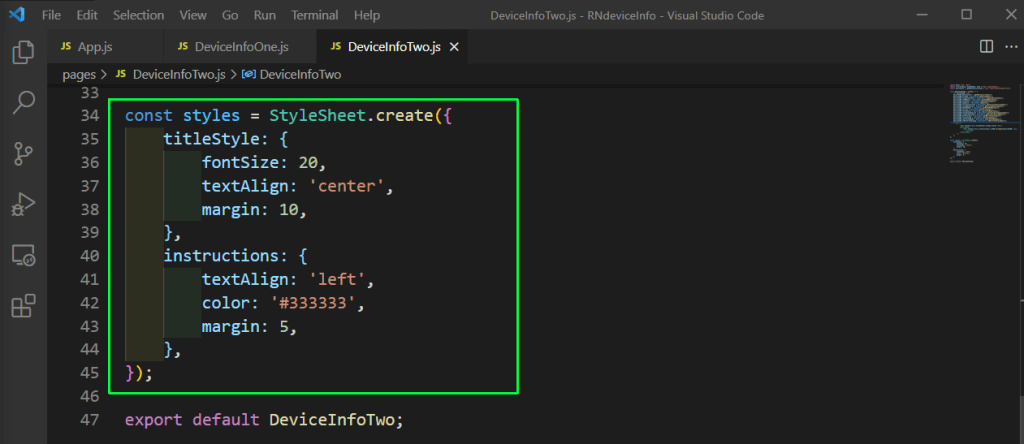
Next, we’ll add some styles for this component in StyleSheet.
Now, our app will display this data.
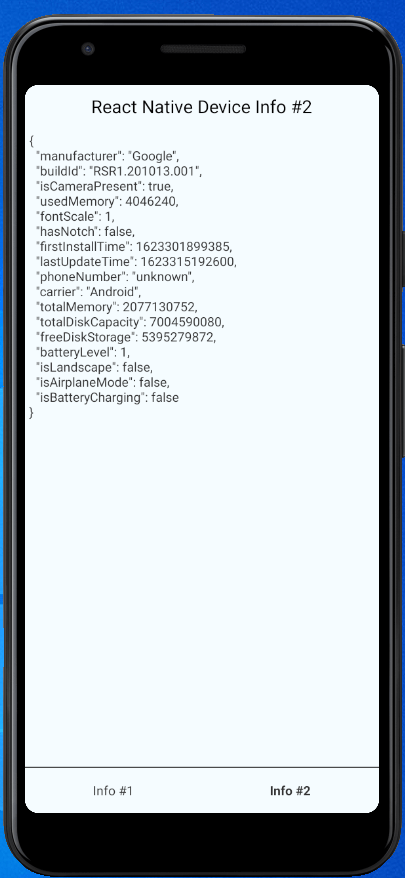
Now, we’ll learn what each of the functions means in the file DeviceInfoTwo.js. But note that most of the functions here have Sync at the end, which means they can operate synchronously. For example, you can call isCameraPresentSync() during your app’s start-up to avoid an async call.
In order to build the app, we’ll need the APK file to deploy it in the respective app stores as well as for testing with Waldo in the next section. We’ll be looking into the steps to create an APK file for the Android store. The process is a bit different than what we do in Expo. We’ll be following the best practices from this official doc.
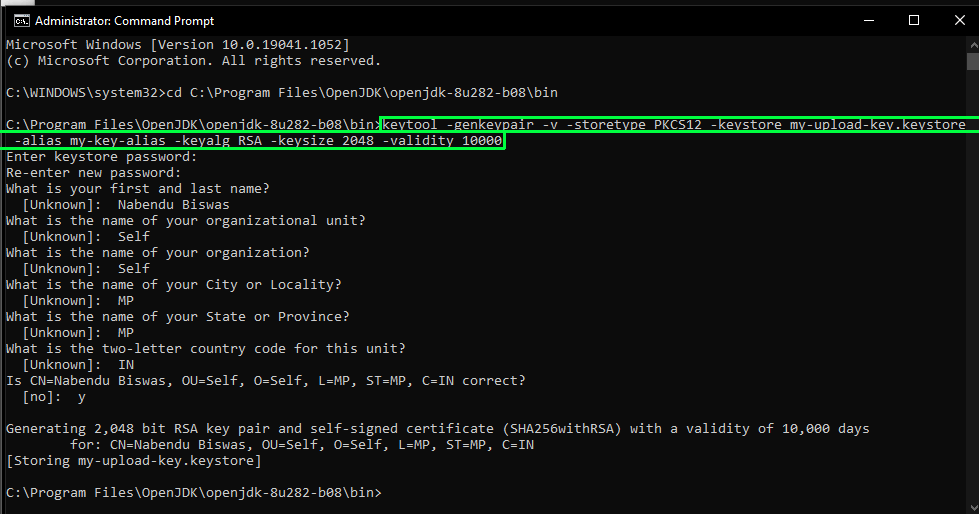
First, we need to generate a signing key using the keytool in Windows. This tool is in the JDK directory of the computer. When we run the keytool command, it will ask us some questions, as seen in the image below. We’ll need to remember the password we have entered, as it will be required soon.
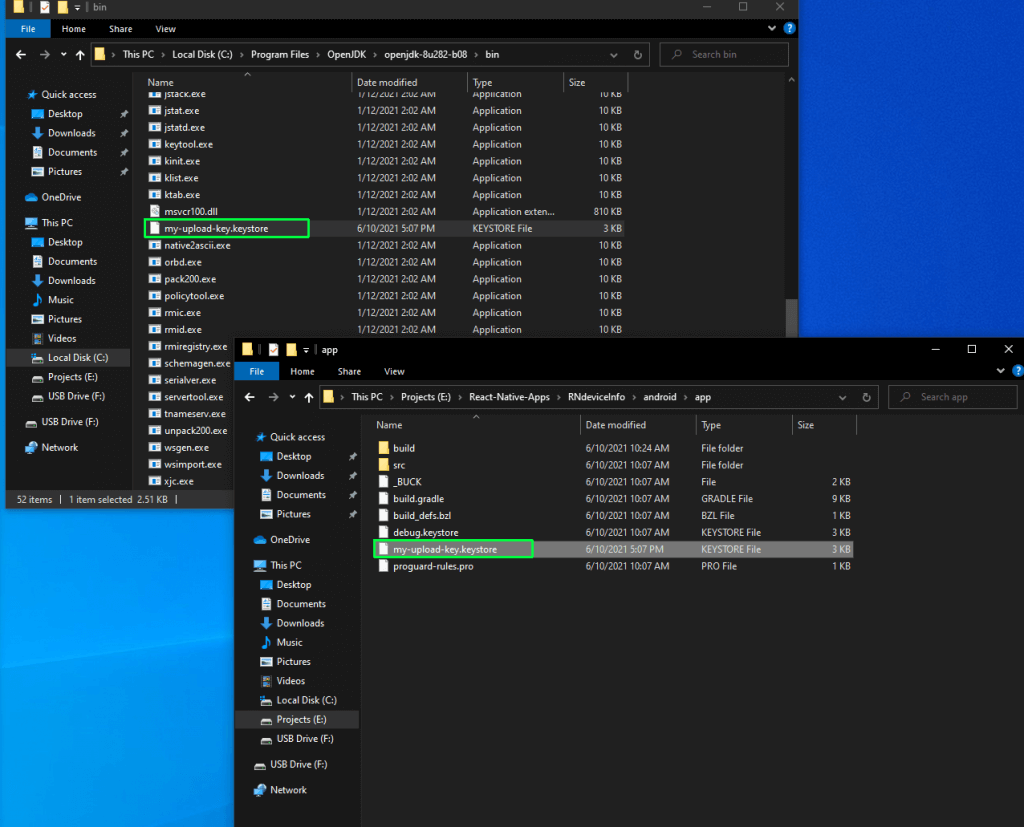
Once the above command is complete, we’ll get a file my-upload-key.keystore in the same directory. We need to copy this file and put it in the android/app folder of our application.
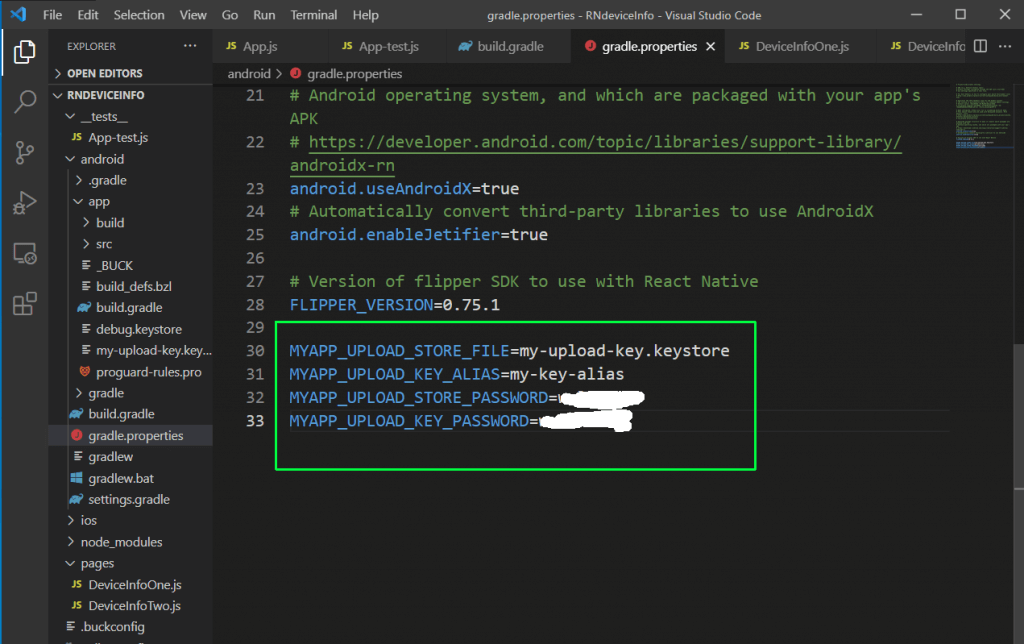
In the file gradle.properties, which is inside the android folder, we need to add the below variables. The password should be the same one we gave earlier.
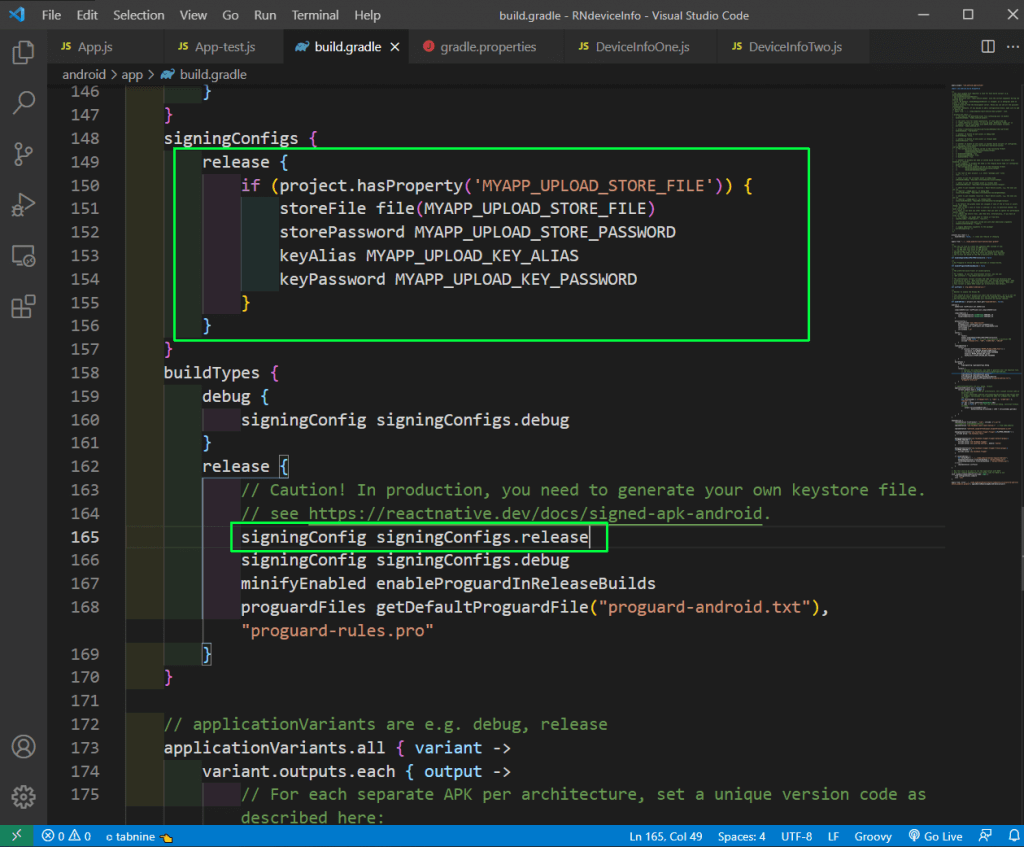
We also need to update the build.gradle file in the android/app folder. In this file, we’ll add the signing configs.
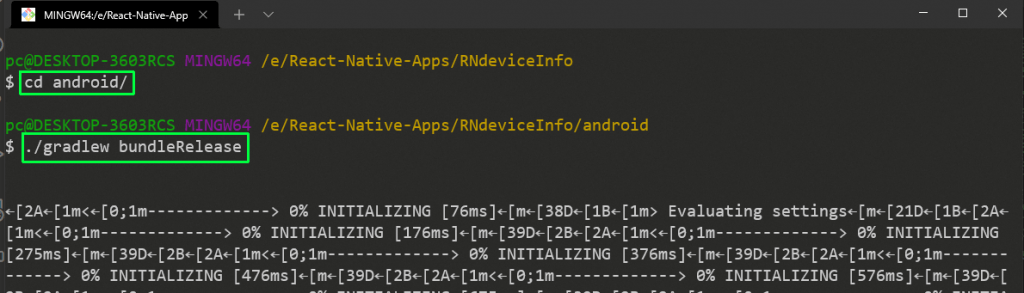
After that, run the command ./gradlew bundleRelease from the android folder to generate the APK file.
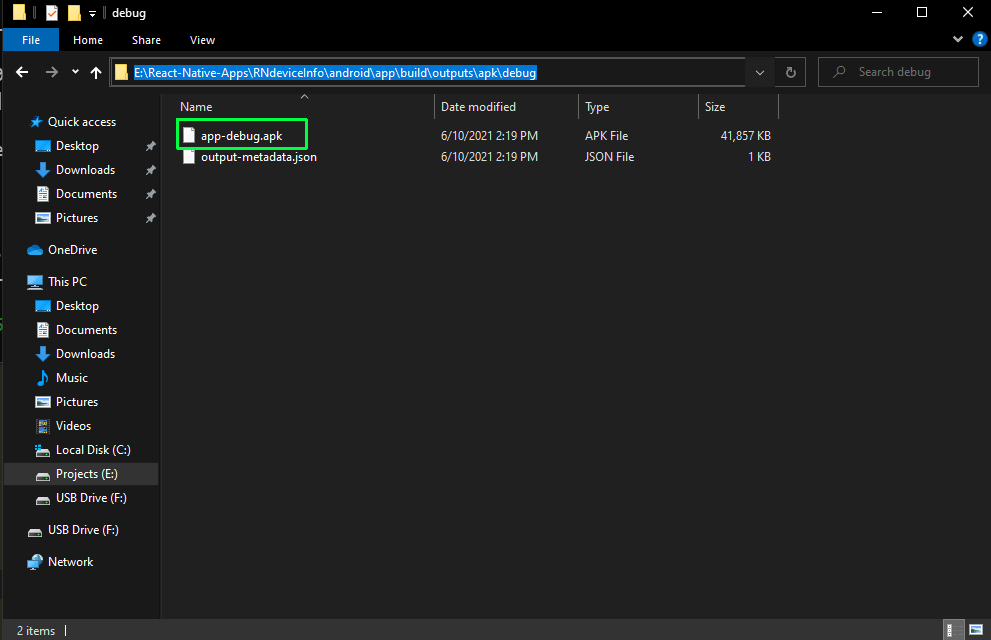
The APK file will be generated in the RNdeviceInfo\android\app\build\outputs\apk\debug folder.
In this post, we’ve learned about the various ways to get device information. We got device information easily through the react-native-device-info library.
Guest Blogger
Nabendu has been working in the software industry for the past 15 years, starting as a C++ developer, then moving on to databases. For the past six years he’s been working as a web-developer working in the JavaScript ecosystem, and developing web-apps in ReactJS, NodeJS, GraphQL. He loves to blog about what he learns and what he’s up to.